|
NetObjects Fusion version 8 now has built in image control and optimization functions.
 The first thing you will notice about the picture properties palette is the full row of tabs that select all of the options available to manipulate your images in page view. There are so many tabs that it is necessary for left and right movement buttons at the far right so that the last two options can be accessed. Now you have high quality image optimization tools available right at your fingertips. The first thing you will notice about the picture properties palette is the full row of tabs that select all of the options available to manipulate your images in page view. There are so many tabs that it is necessary for left and right movement buttons at the far right so that the last two options can be accessed. Now you have high quality image optimization tools available right at your fingertips.
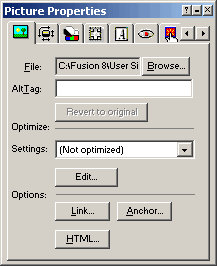
The 1st tab is the General tab (default tab) you will find all of the tools that have always been with Fusion such as the browse for image button, the alt tag (version 8 now places the image file name as a default alt tag for you), the Link button, the anchor button, and the HTML insert button.

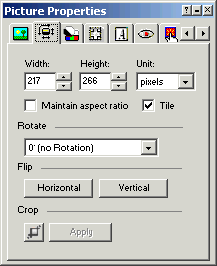
The second tab is the Geometry settings. On this tab you will find the controls to:
- Flip the image both horizontally and vertically
- Change the width and height by pixels or percentages
- Rotate it at set 90% angles completely around
- Make multiple images by tiling the image
- Now you can crop images directly within Fusion.
This is just the beginning of what is now available....
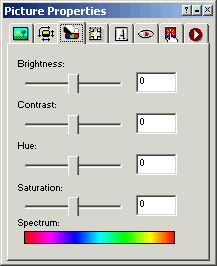
 The third tab is the Color Adjustments. Here you will have the ability to control all aspects of the image The third tab is the Color Adjustments. Here you will have the ability to control all aspects of the image
- Brightness
- Contrast
- Hue
- Color Saturation
The controls are either a slider or you can directly enter in a + or - number for exact control.
The fourth tab is the Border tab. Here you can place a border around the image and select Solid, Dotted, or Dashed. You have the ability to set the thickness of the border and to pick the color you want the border to be.
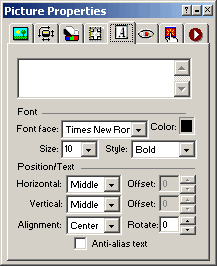
 The fifth tab is the Text in Picture tab. This is a much easier to use arrangement from the old series of pop up palettes that were required in older versions to control the appearance of text you wish to place within an image. There are the same controls as before, they are now all on one palette rather than being spread over 3 popup palettes. The fifth tab is the Text in Picture tab. This is a much easier to use arrangement from the old series of pop up palettes that were required in older versions to control the appearance of text you wish to place within an image. There are the same controls as before, they are now all on one palette rather than being spread over 3 popup palettes.
The sixth tab is the Red Eye Reduction tab. Here you can remove that annoying reflection from eyes that are so bothersome. You can select the color of the eyes (blue, green, brown, etc.) or pick a custom color from the color picker to replace the red.
The seventh tab is the Hot Spot control tab. If you have created hot spots on an image using the hot spot tool from the NetObjects Fusion tool bar you can add alt tags and edit the link target from this palette. There is also an HTML button that allows you go add custom coding to your hot spots.
The eighth tab is the Picture Alignment tab. This is the same as on all other versions of Fusion. It allows you to aligh the image in all posible variables.
The nineth tab is the Actions tab. This is the same as on all other versions of Fusion
Did you find this tutorial useful? Would like to view all of our tutorials and support pages?
Join the NetObjects Fusion Users Group Community
This page was written by and is maintained by turtle
|