Creating A Simple Flash Photo Gallery
 Start by creating a new blank page to hold your photo gallery Start by creating a new blank page to hold your photo gallery
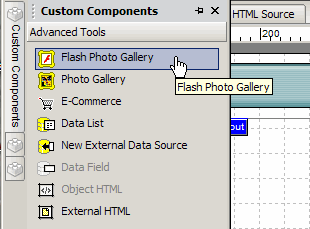
From the Custom Components Tool Bar Flyout click on the Flash Photo Gallery icon and draw a rectangle on your newly created page
The Flash Photo Gallery component palette will open and you can start selecting images and crating your flash based photo gallery
In the top area of the Photos Palette you can navigate to any folder and select images to add to your Flash Photo Gallery
Click Add to Photo Gallery to incorporate the selected photos into your photo gallery. You can make selections from any folder on your computer and add them to your photo gallery
In the lower area of the Photos Palette you can give your album a descriptive name by editing the Title field. The photos you selected will be listed under your album name. If you click on the name of the image a preview will be shown in the Preview pain You can set the created file type (jpeg or gif) and set the quality of the generated image. Once you have the file type and image quality set as you desire you can press the Apply to... and select All Images in this album or to ALL images in every album you have created.
When you added images to your album they were placed in the order that you selected them original. To change the order in which they will be displayed in your photo album, highlight the image in the list and use the up and down arrows in the tool bar to rearrange them
Press the Next button and another photo gallery palette will be displayed where you can format the look and feel of your flash photo gallery
Did you find this tutorial useful? Would like to view all of our tutorials and support pages?
Join the NetObjects Fusion Users Group Community
|