Advanced Usage and Concepts with Surreal CMS and Fusion
If you are not familiar with Surreal CMS and how to insert the settings in Fusion that make it work go over the basic Surreal CMS tutorial before going further
Multiple Editable Areas on a Single Page
Multiple areas on a page can be set up to be edited using Surreal CMS and you can also set separate named areas to make it easier for your client. So you could have a page that contains a text area, a table and an image. All three elements can be placed in one editable area or you could create three separate named areas.
This tutorial will use a Fusion text box as the example editable area
- Go to the page you wish to have the editable content located on
- From the toolbar select the Text Tool and draw a text box to hold content
- Enter in some "place holder text". Something like "editable content goes here"
- Click outside of the text box area to leave the insert mode
- Now click the text box to select it outside of insert mode
- Press the HTML button and wrap the paragraph tag with the following div statement
div id="area-1" class="editable" and enter a closing div tag after the Fusion paragraph statement
For additional editable areas place additional text boxes and add the div statement and id="area-2", id="area-3", etc as outlined above. Each editable area you set up will be shown to the user / client when they log into their Surreal CMS account and select the page that has these editable areas on it. This will allow you to set up a page design and layout but allow the user to add, edit, delete any of the content on the page using a web browser.
Creating Seperate Editable Documents
As you know, content edited outside of Fusion will be over written if a page is generated via a remote publish. You can avoid this by creating a separate document to hold the CMS content and calling the document into the Fusion page using a dynamic include statement.
You can use any dynamic language your web host supports. If you are hosted by gotFusion you can use either ColdFusion, PHP, or ASP include statements as all dynamic languages are offered on all hosting accounts. If you are hosted somewhere else, contact your web host to find out what dynamic languages they support.
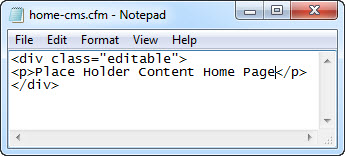
Open Notepad (yes Notepad). Enter the Surreal CMS opening div statement, followed by a paragraph tag with some holder text then add the closing div statement. Save the notepad document with a name that is easily recognizable to your user. For content on the home page you may want to call the document home-content for an announcement call it announce-content. You will need to save the files with the extension that is supported by your web host. On gotFusion hosting this can be .cfm, .php, or .asp, your choice. The best way to identify your content documents is to use the page name the CMS content will be displayed on, followed by the word content or cms then the dynamic language extension.
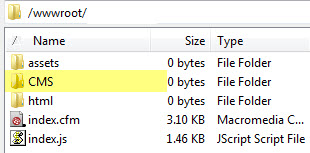
Open your 3rd party FTP program and go to the http root folder of your live domain. Create a new folder off of your http root called CMS.
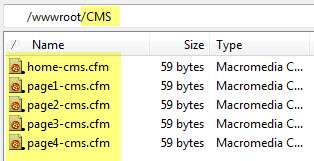
Upload the placeholder documents to the CMS folder on your domain using a 3rd party FTP program. Since the CMS content is now external to Fusion you do not need to worry about overwriting any of the user / client content.
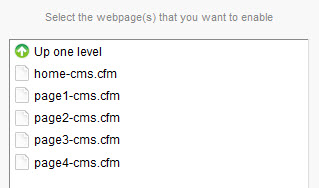
You should log into your hosting control panel and set the default log in folder on your Surreal FTP account to: /wwwroot/CMS (for gotFusion windows hosting) or /public_html/CMS (for gotFusion Linux hosting). This way only the CMS folder which holds the CMS content documents will be accessible to the Surreal CMS online editor. By using a dedicated FTP account restricted to the CMS folder your user / client will only see and have access to the documents that are in the CMS folder, nothing else.
Using Dynamic Include Statements To Display the CMS Document
To place a dynamic include statement in Fusion:
- Go to the page where you wish to display the CMS content.
- Draw a text box where you wish the content to display
- Press CTRL + T (hold the control key and press T) to bring up an HTML insert box
- Paste the include code of your choice into the dialog box
- Press OK
Your include statement will need to be in relative document notation. This will be different depending on what publish method you are using. If you are using By Asset Type (as in this tutorial). All documents will be in the html folder except for the home/index page which will reside in the root folder.
To call a document into a parent page in the html folder you would enter ../CMS/document.ext (dot dot hash, folder name, document name, extension). To call a CMS document into the index/home page the notation would be ./CMS/document.ext (dot hash, folder name, document name, extension).
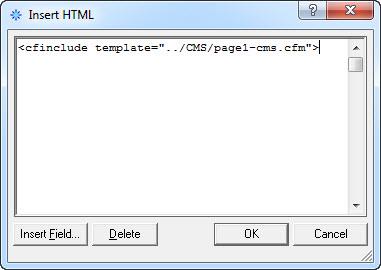
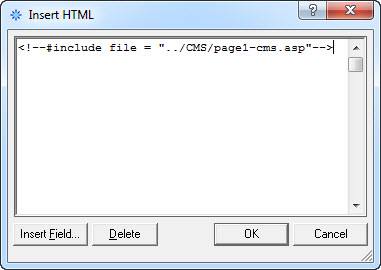
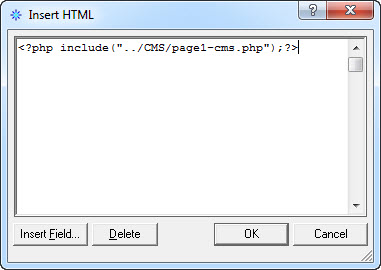
Below are 3 include file statment examples using ColdFusion, ASP, and PHP calling a CMS document located in the CMS folder into a parent document located in the HTML folder.
ColdFusion Include |
 |
ASP Include |
 |
PHP Include |
 |
Once you have inserted all of the include statements where you wish to have CMS content you need to set the page extension to the dynamic language you are using so that the web server knows how to handle these lines of code
This gotFusion tutorial will explain how to change all file extensions from html to cfm, asp, or php.
|
Did you find this tutorial useful?
Do you want to keep this resource online?
Make a donation to keep gotFusion alive
This page was written by and is maintained by turtle
|
|