Create Your Store Catalog And Start Selling
The NetObjects Fusion e-commerce Component will create for you a list of your items for sale and if you choose it will also create a detail page for each of the items in the list. It will automatically interface with the store engine you have selected and send information on your items in the proper format to be processed and sold. The store engine will handle all of the credit card processing so all you have to worry about is entering your items and setting up how they will display on your web pages.
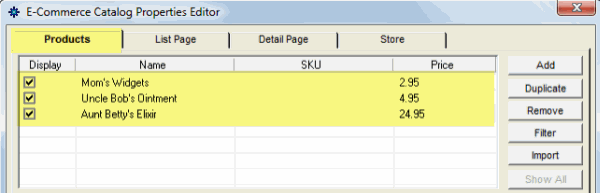
Once you have created or selected your your store engine from the list of previously created possibilities you will be presented with the e-commerce Catalog Properties Editor. This is the only palette for your store. On it you can do anything and everything to present your items for sale.
The e-commerce editor has four main tabs labeled Products | List Page | Detail Page | Store Each of these tabs controls an operation area and under them you will have sub tabs to fill in with your products information.
Products Tab:
The upper section of the Products Tab is the list of items in your store. Placing or removing a check box in front of the item will show or hide the item on your store. Press the Add button to put another item on your store. Highlighting an item in the list and pressing Duplicate will create a copy of an item that you can edit. Highlighting and pressing Remove will delete the highlighted item. Press the Filter button and you will be able to show selected items based on a selected criteria which will make it easier to find items in a large store. The Import button will allow you to import a tab delimited text file of items into the store component.
Adding an Item
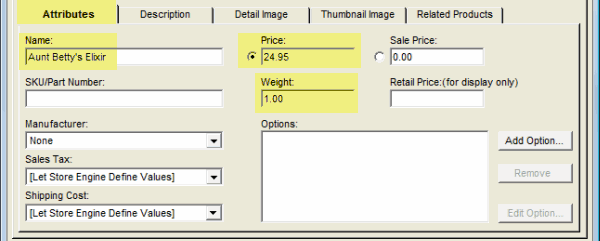
Press the Add button and enter in a Name, Price, and Weight in the Attributes tab below. This is the minimum content you will need for an item. If you have a SKU number or want to show a "sale price" add these. To use the sale price in place of the normal price tick the radio button in front of it instead of the normal price. If you want to add a list of manufacturers to choose from click the drop down and add them, once added you can select from the list. You can enter in sales tax and shipping formulas or you can let the store engine determine these at check out time by leaving the default settings. You can create groupings such as size, color, or style using the Options feature. You create them by pressing the Add Option button and entering a Group Name and label such as T-Shirt Size. Once a group is created you can then add attributes to the group such as small, medium, large. Once these are created you can assign store items to a group by selecting the store item in the items list then selecting the group you created from the options list.
 |
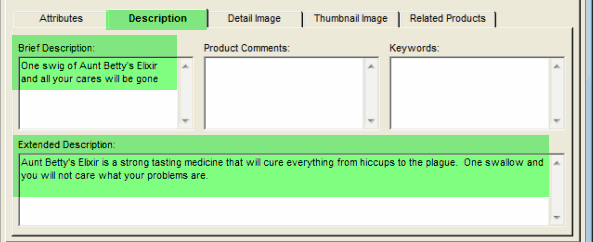
Product Descriptions
Click the Description tab and enter in a brief and expanded description of the item. The brief description will be on the store list and the extended description will show on the product detail page. You can also enter in comments and keywords for the product
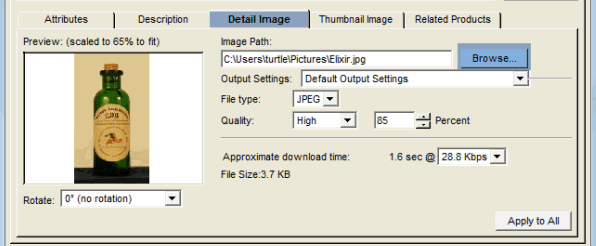
Detail Image Tab
Click the Detail Image tab and navigate to the pic of the item you are adding. The detail image will be used on your product detail page. You can use all of the NetObjects Fusion image editing tools to size and compress your image if you have not already done it outside of Fusion. By clicking on the Apply to All button you can make all Detail Images take the same settings you just edited
Thumbnail Image Tab
Click on the Thumbnail Image tab and you can use all of the Fusion image editing tools that are available on the Detail Image tab to size a thumbnail for your list of items for sale. You can accept the Fusion defaults if you do not wish to create a custom sized thumbnail. By clicking on the Apply to All button you can make all thumbnails take the same settings you just edited
Related Items Tab
Clicking on the Related Items tab you can relate other store items to the one you are adding, creating cross links among your products
Go to the Next Section of the Store Tutorial to see how to format your store display list
|
Did you find this tutorial useful?
Do you want to keep this resource online?
Make a donation to keep gotFusion alive
This page was written by and is maintained by turtle
|
|