Creating a New MasterBorder
With Fusion you can create as many different MasterBorders as you wish and apply them to different pages. A MasterBorder is simply a border that will repeat its contents on any page sharing the same MasterBorder. This can also be very useful for multi level navigation.
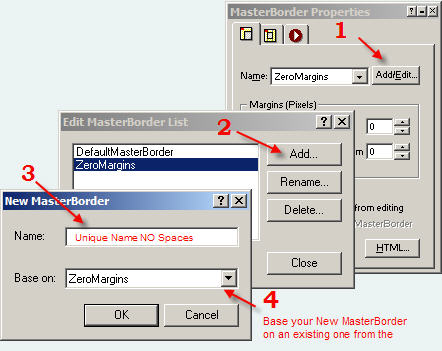
In page view, press F10 to bring up the MasterBorder Properties palette.
1. Click Add/Edit button on the MB Properties Palette
2. Click the Add button
3. Give the NEW MasterBorder a unique name. Spaces and special Characters are not allowed.
4. Select an existing MasterBorder to base your new MasterBorder on.
Click OK


The current page will be assigned the NEW MasterBorder name. You can then change anything you wish on that MasterBorder and it will only effect the page that it is assigned to.
Setting MasterBorders On Multiple Pages
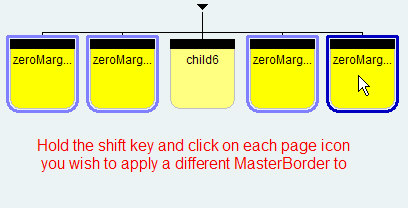
To apply your NEW MasterBorder to more pages Click the Site View Icon to go to Site View. Then hold your shift key and click any page you wish to have this new MasterBorder applied to.


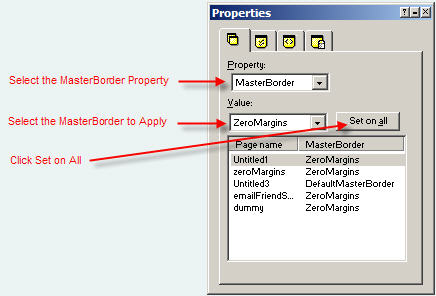
From the the drop down on the Site View Properties pallet select:
MasterBorder Property
Then the MasterBorder you wish to apply
Then click Set on All


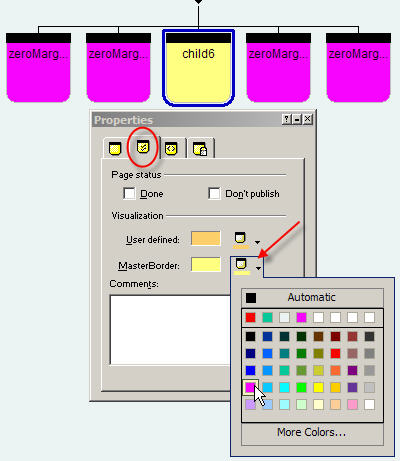
To easily identify different different MasterBorders, under Visualization select MasterBorder and select a color


|
Did you find this tutorial useful?
Do you want to keep this resource online?
Make a donation to keep gotFusion alive
|
|